Suppose you're working on a large project at work and want to mark all Outlook items associated with this project. You can create a category and then categorize all Outlook items that are related to this project. In the different areas of Outlook (Mail, Calendar, Contacts, Tasks, etc.), you can group and view items by category.
Customize Categories
By default, Outlook has generic categories set up (Red Category, Blue Category, etc.). Each of these categories can be customized to meet your unique needs. You can create new, rename existing, or delete categories.
- Click on the Mail button in the Navigation pane.
- Click on the Category button and select All Categories from the drop-down list. The Color Categories dialog box will open.
- In the Color Categories dialog box, you can create, rename, or delete a category. You can also select or change a category color and apply a shortcut key to the category.
- Click OK to close the dialog box.

 Categorize Outlook Items
To categorize an Outlook item:
- Select the Outlook item to be categorized.
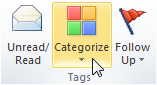
- Click on the Categorize button in the Tags group.
- Select the category to be applied.
A category can also be applied to an Outlook item by:
- right clicking on the item, clicking on Categorize in the context-sensitive menu, and selecting the category.
- opening the Outlook item and selecting the category from the Categorize button in the Tags group.
When an item is categorized, the color and category name will be displayed below the ribbon on the open item. Also, the color will be displayed on calendar items and in the category column in list views.
View by Categories
- Click on the View tab.
- In the Arrangement group, click on the Categories option.

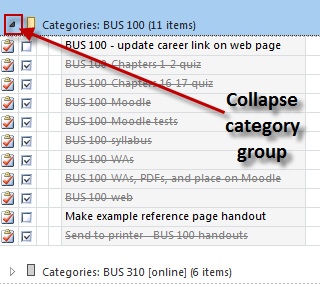 The items will be grouped by category. If an Outlook item is assigned to multiple categories, the item will be displayed in each category to which it is assigned.
Categories can be expanded or collapsed by clicking on the small triangle to the left of the category name. Also in the Arrangement group on the View ribbon, you have Expand/Collapse and Sort options.
Note: In the Calendar and Notes, you must first change to a list view before you can arrange the items by category.
Set Quick Click
 The category quick click is used to assign a category without having to select from the category list. In some of the list view for Outlook items, there is a Category column (field). You can select one of your categories to be the quick click category, which can be assigned to Outlook items by clicking in the category field for an item.
- Click on the Categorize button in the Tags group.
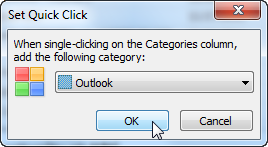
- Select Set Quick Click. The Set Quick Click dialog box will open.
- Select the category to be the quick click category.
- Click OK to close the dialog box.
An assigned category can be removed from an item by selecting the item, clicking on the categorize button, and deselecting the category to which an item was assigned. The Clear All Categories option on the Categorize button can be used to remove all categories from an item.
In the Color Categories dialog box, you can delete, rename, or create new categories.
- Click on the Categorize button in the Tags group.
- Click on All Categories to open the Color Categories dialog box.
- Make the desired changes: New, Rename, or Delete.
You can also set a shortcut key combination to apply a category.
Have fun using categories...they are a very useful tool to help keep you organized in Outlook. Next month we'll discuss rules, which are one of the most powerful tools in Outlook.
No comments:
Post a Comment